Testing procedures
PulsePins was designed from the start to support a high degree of internal self-testing. For this
reason, the FPGA fabric includes a run-length encoder for reading back the generated stream and
comparing it against expected results. These tests are performed with the pptest
tool. A collection of shell scripts can be found in the tests/ subdirectory. To start one sweep
of the test battery, run run_all_tests. If any error is encountered, testing stops immediately.
Successful completion is reported by printing the message SUCCESS.
The hardware tests enable output drivers and exercise nonzero 3.3 V patterns. Disconnect external circuits from driven PulsePins signals, or verify that they can safely accept those patterns, before starting a sweep.
One can run the tests continuously using run_all_tests_forever to perform intensive
stress testing. Current-source builds collect logs under /var/volatile/pulsepins-test-logs for inspection:
report records the pptest version, bitstream timestamp, and successful-run timestamps, while
report.run_N files contain per-run output. Pass -no-report-files to avoid writing the
accumulating report.run_N files during long burn-in runs. The runner exits with failure on the
first failed sweep, including child processes killed by signals.
Wiring up for testing
Recommended color coding for connecting the DE10-Nano to a Saleae logic analyzer is provided in
the comments in the pulsepins.sv design file.
The image below shows a testing jig. It uses custom cables to connect the logic analyzer to both GPIO ports. Eight bits of qout on the Arduino port are connected to LEDs. An oscilloscope is connected to clock signals on the Arduino port. Some wires for hooking up external clock sources are also visible.
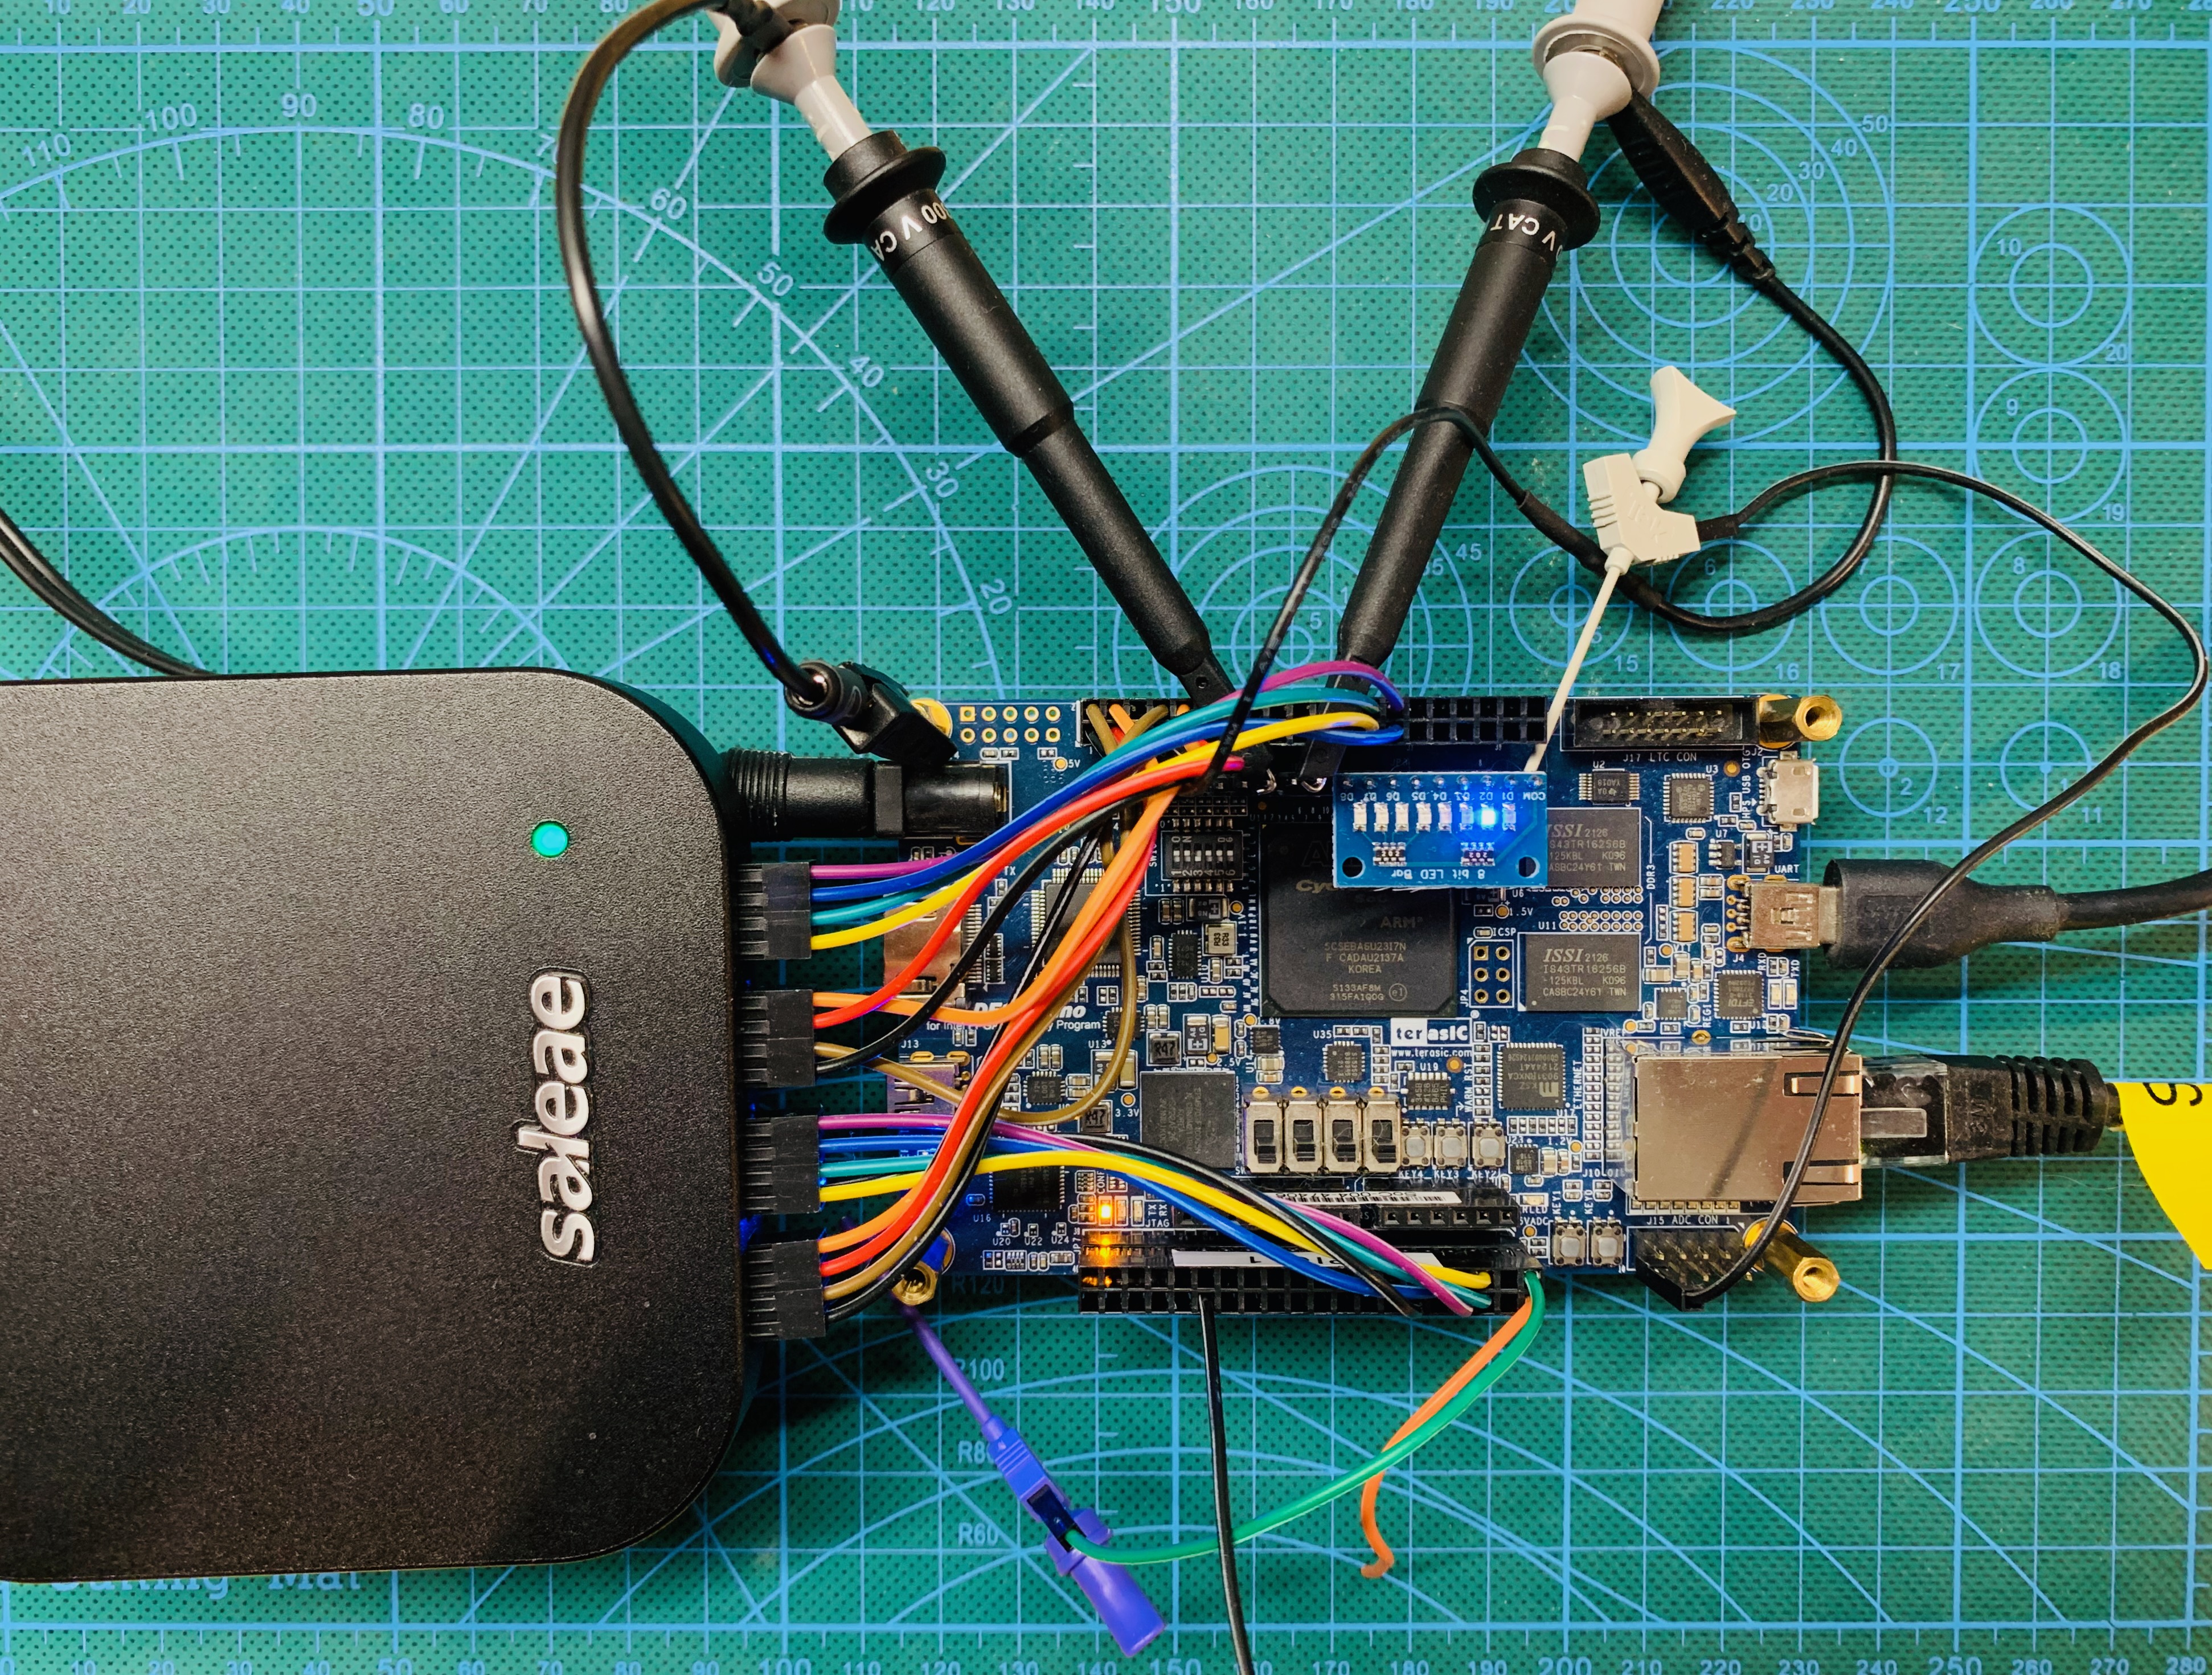
Arduino header
Selected output and clock signals are brought out on the Arduino header for probing and tests. See the DE10-Nano signal reference for the current mapping.
Manual testing
Some test procedures require additional external test equipment or external wiring.
Manual board smoke
For a quick hand-run live-board regression check from the repository root, use:
make board-smoke
This is intentionally smaller and faster than run_all_tests: it redeploys the locally built FPGA image and board executables, reloads the FPGA, runs a few finite pptool checks, and exercises both ppscpi and ppwebgui over the network. Override the target board with TARGETHOST=... if needed.
Before touching the board, run the local checks:
make dev-check
Use the three levels like this:
make dev-check- local build and test checksmake board-smoke- fast manual live-board regression testrun_all_tests- intensive target-board validation sweep
Random number generator
The built-in random number generator can be tested by running pptest 19. By connecting
an output signal to a spectrum analyzer, one can examine the whiteness of the spectrum.
When Q0 or Q1 is suitable, use the buffered SMA outputs on the PP_PMOD board;
use appropriate external buffering or probing for other outputs.